One of the most valuable features of Overland Bound One is the ability to record the paths you travel! Primarily, this is to create a path where maintained roads don't exist, or to map your specific path to share with others.
Overland Bounds track recording is also of higher equality and more detailed resolution compared to other apps. Our goal is track accuracy over data size.
Prefer a video app tutorial?
See it here!

Recording:
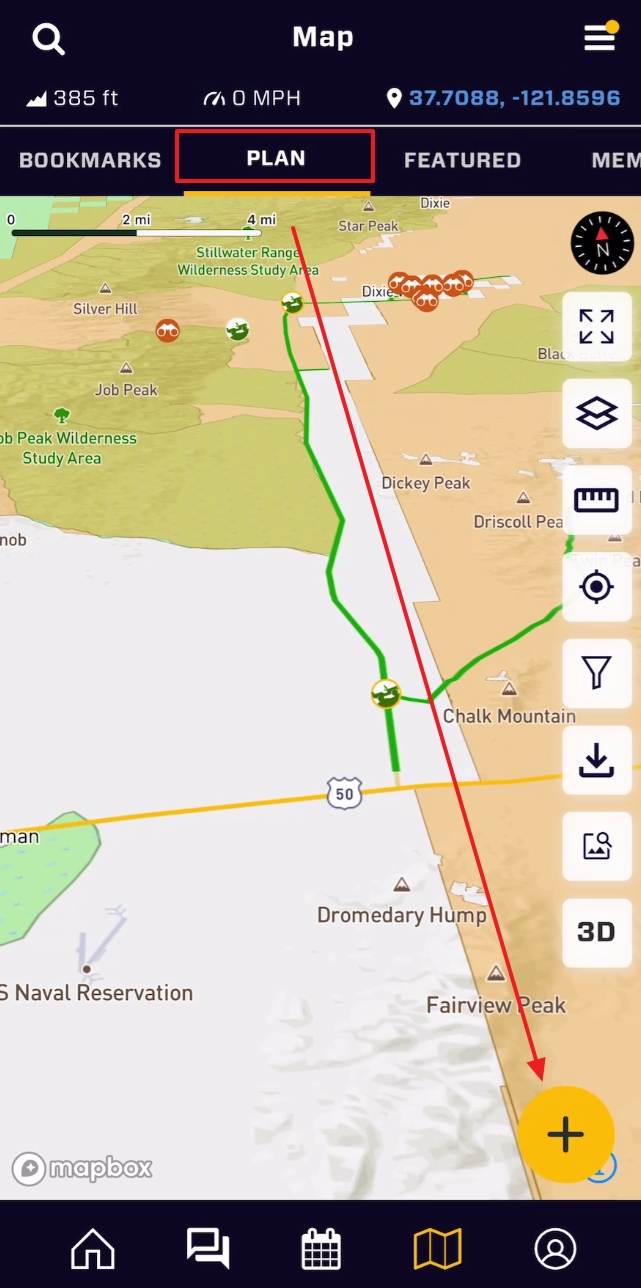
To begin recording a track, go to the Main Map or Plan tab of the OB1 Map. Tap the big yellow "+" button and select "Record Track".
That's it!
While recording, you can even close the app. When you open it again, the app will resume recording. While closed, the app will not record your movement. This means if you close the app while recording, and you move, when you reopen the app, you will get a straight line from your last known location to the current location.
Once you tap "Record Track" you will immediately notice the app in track recording mode:
As you travel, you will notice a blue line appearing on your current path, indicating the track being recorded.
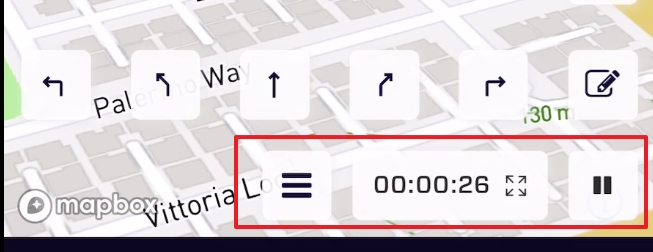
Recording Tools
Waypoint Arrows: Tapping the arrows along the bottom of the map screen while recording will add a text route note to the GPX indicating which way to go. Like, "Slight Right".

Milage Markers: milage markers are added to the track as text waypoints depending on your settings. This can also be turned off. Milage markers appear with you select the location in the app:These milage markers can be set in the settings menu under Slide Out Menu -> Settings -> Map and markers can be set to 1 mile, 10 miles, or none.
Notes: Notes are also text added to the route. You can add a name and a description.
Pause: The pause button is located in the lower right corner of the map while you are recording, and can also be accessed through the recording menu.The pause button allows you to avoid "satellite drift" if you will be stationary for a long time. OB1 mostly cleans up bad tracking points with some slick tech that does predictive triangulation to record the most valid track, but, the pause button will allow you to manually turn off recording to avoid any points being recorded.
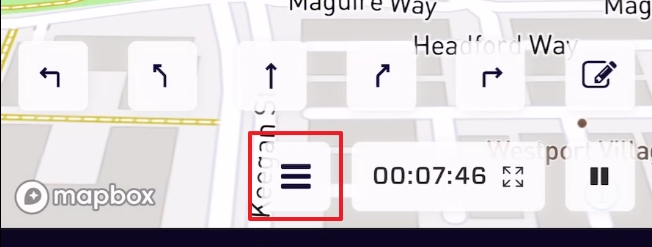
Cancel: The cancel button is also accessed through the recording menu, and allows you to cancel and delete the current track being recorded.
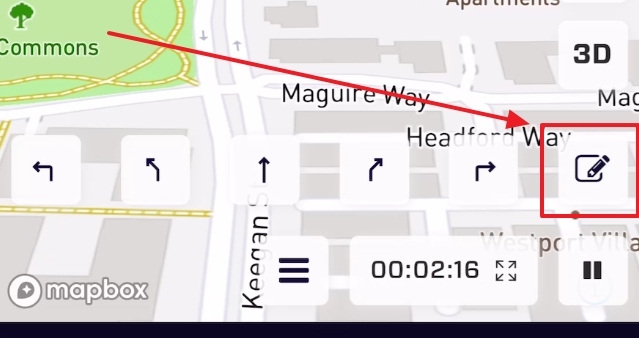
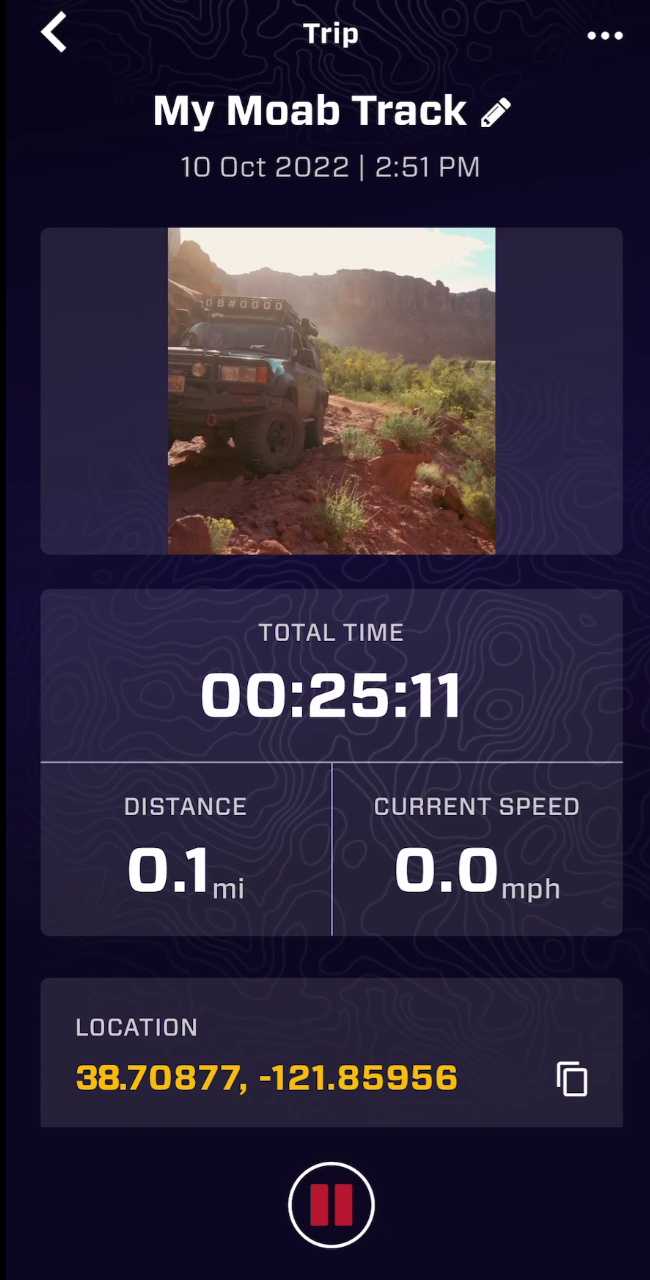
Recording Screen:
To gain access to the recording screen, tap the timer. It will open the screen. The recording screen allows you to set the title and feature image - helpful to set the image at the beginning of the track. While driving, other metrics are displayed in real time including:
GPS Location
Heading
Pace
Altitude Profile
Speed Profile
Saving Your Track
All save and cancel options are accessibly through the record track menu:

Cancel: cancels the recording and deletes the track that was in progress.
Quick Save: Similar to Quick Saving a Location this will immediately save the track and produce a icon and summary card without the need to add a bunch of information. This track will be local until a detail save is completed. See Adding POI Locations for more information about a detailed save vs quick save.
Detailed Save: Add details to queue this location to be uploaded and archived on our servers. This creates a backup, and if set to public, will share it with the community. See Adding POI Locations for specifics.